Record From Mixer To Ipad Garageband
Posted : admin On 10.04.2020- Record From Mixer To Ipad Garageband Video
- Record From Mixer To Ipad Garageband To Computer
- Record From Mixer To Ipad Garageband Pro
In this feature I ditch the recording studio and take a look at the best portable interfaces for GarageBand musicians who want the freedom to record anytime, anywhere.
The beauty of an app like GarageBand for iOS is that you no longer need to spend ludicrous amounts of money renting studio time or wait until your ‘big break’ to write, record and release your own music.
Use the Audio Recorder in GarageBand for iPad. Using the Audio Recorder, you can record your voice, an instrument, or any other sound using the microphone on your iPad, and play it back in GarageBand. You can also record sounds using an external microphone connected to your iPad. If you can't record audio after a macOS Mojave update. After installing macOS Mojave on your Mac, you might not be able to record audio in Logic Pro X, MainStage, GarageBand, Final Cut Pro X, or third-party audio and video apps. Learn what to do if you can't record audio after updating to macOS Mojave. How to increase the recording time in Garageband for iPad or iPhone by Mark — in Guides. 8 Comments on How to increase the recording time in Garageband for iPad or iPhone You might have come across this like I did that when you start to record in garageband you can only record for about 8 seconds.
If you want your DIY music to sound its best however, you’ll need to ditch that inbuilt mic on your iOS device and invest in an audio interface of some kind.
There’s tons of choice out there and it can be hard to work out what interface is right for you. I’ve brought together 3 of the best portable recording interfaces on the planet to help you narrow down your options.
Let’s take a look.
£74.99/$99.99
Compact, portable, and easy to use, the Roland GO:MIXER makes it simple to record high-quality audio with your iDevice.
With multiple inputs available, you can connect a mic, musical instruments, and media players and mix them all together at the same time.
The unit features the ability to combine five sources at once via inputs for a ¼” jack vocal mic (no XLR input or +48 V Phantom Power here), guitar, stereo keyboard, and two stereo line-level devices (such as music players, drum machines, etc.).
The quality is great, assuming you don’t clip/peak the audio. There is a dial for each main instrument input as well as a master volume dial to adjust as appropriate. The GO:MIXER also has a peaking LED which is useful to have.
All in all this little box is incredibly versatile, though the lack of XLR input or 48v Phantom Power would definitely prove limiting for some.
Tech Specs
- Inputs: 8 channels
- Outputs 2 channels
- Connectors INSTRUMENT (L/MONO, R) jacks: 1/4-inch phone type
- LINE IN 1 jack: Stereo miniature phone type
- LINE IN 2 jack: Stereo miniature phone type
- MIC jack: 1/4-inch phone type (no plug-in power)
- GUITAR/BASS jack: 1/4-inch phone type (high impedance)
- MONITOR OUT jack: Stereo miniature phone type
- USB port: USB Micro-B type USB Bus PowerCurrent Draw40 mA
- Accessories: Lightning to USB Micro-B type cable (50 cm, 1 ft 7 inches)
- USB OTG Micro-B type to USB Micro-B type cable (50 cm, 1 ft 7 inches)
£81.99/$119.99
Focusrite has a great track record for producing extraordinarily high quality USB and Thunderbolt audio interfaces for Mac and PC. With the iTrack Solo Lightning, they’ve packed most all of the killer features from their range into this little box.
While it is smaller and lacking a few of the features of some of Focusrite’s more expensive units , the iTrack Solo packs enough of a sonic punch to hold its own against most other interfaces at this price range.
The mic preamp used here series are nothing short of phenomenal, giving you clean and clear recordings every time. There’s also +48 V Phantom Power available, so you can use a studio quality condenser microphone to really push the quality of your recordings to the next level.
Super-low latency brings confidence to your performance, letting you record and monitor with software effects in real time.
New gain controls and a sleek metal chassis underscore its industrial design – this thing can take one hell of a beating!
Tech Specs
- 1 microphone input – XLR, 1 Instrument input ¼’ unbalanced, 2 Gain knobs,
- 48V Phantom power switch, Direct monitor switch
- 2 unbalanced monitor outputs – RCA Phone, DEVICE LINK port (to connect iTrack Solo to iPad)
- USB 2.0 Port, Kensington Lock slot
- Supported sample rates 44.1 KHz, 48 KHz, 88.2 KHz, 96 KHz – Mac and PC 44.1 KHz, 48 KHz – iPad
- In the box: iTrack Solo, 1.2m USB cable, 1.2m “DEVICE LINK” cable (to connect to a Lightning iPad), Getting started guide, Registration card, USB power supply (US only)
- Compatible with: iTrack Solo Lightning: Any iPad with Lightning connector, Standard iTrack Solo: iPad (1st gen), iPad (2nd gen) and iPad (3rd gen)
£127.99/$149.99
iRig Pro I/O is a pocket-sized full-featured audio and MIDI interface that gives you 24-bit/96kHz recording studio quality sound everywhere you go with a few additional essential features for mobile recording.
Its designed to be “plug and play” and easy to use with all of your gear — studio mics, vocal performance mics, guitars, basses, keyboards — whatever it is, iRig Pro I/O can probably handle it.
It features a new 1/8″ stereo headphone out with preamp and level control, making it compatible with even the most recent iOS devices. Plus, when used with the optional DC power supply, the unit will charge your iPhone or iPad while in use for unlimited playing and recording time – super handy!
The Pro I/O also features a new MIDI Out jack that gives you even more flexibility and control over your outboard MIDI gear.
Despite it’s small size the iRig Pro I/O has it where it counts, packing the features you’d expect from a full scale audio interface into it’s sleek form factor.
Tech Specs
- High definition 24-bit/96kHz audio plus MIDI interface for iPhone, iPad, Mac, PC and Android devices
- Connects to everything, yet easily fits in your laptop bag, gig bag or pocket
- Neutrik™ combo input for guitar, microphone or other instruments with a professional quality preamp, phantom power and gain control
- iPhone 7 ready with integrated headphone output with volume control
- Powered via USB bus, two AA batteries or the optional iRig PSU 3A (PSU simultaneously charges iOS device)
- Detachable Lightning and USB cables included for connection to iPhone, iPad, Mac and PC (MFi certified)
- Comes with a Velcro strip to secure iRig Pro I/O to a mic stand
- Comes with over $/€550 worth of full version Software & Apps
There you have it, that’s my top 3 favourite portable audio interfaces for use with GarageBand for iOS.
Is your favourite on the list? What did I miss out? Leave a comment and let me know, or come and join the conversation on Facebook and Twitter.
After seeing one of THE best live bands (RUSH!) this week with one of THE world's best rock drummers (Neil Peart), it's only fitting to be inspired and do a tutorial on recording drums with Garage Band for iPad. If you're lucky enough to have a seat close to the stage, it's quite an experience to see the 'Professor' up close and actually hear his drum sound coming from the stage. So on with the tutorial.. and a mean mean stride..
Let's look at the setup and equipment needed and the different options - Acoustic and electric - we have..
Acoustic Kit (Never Turn Your Back On a Monster!)
1. Stereo Blue Microphone Yeti Pro or other USB microphone.
Stereo is crucial if you want to get a fat sound. IK Multimedia has released the cool iRig microphone but it's mono and you can't combine 2 of them on the iPad. Now, this being said, perhaps you're going for a mono drum sound like the Beatles.
2. Griffin iMic or the upcoming Alesis iO Dock with a multichannel mixer and your own mic collection.
If a stereo mic isn't enough and you want more mics and control, then simple run the mics to a mixer and attach it's stereo outputs to the inputs of the iMic or Alesis I/O. For example, you may want a Kick/Snare/stereo overheads setup. The only caveat in this setup is that you will need to not only balance your volume levels between the mics but also pan and EQ them to the sound you want BEFORE you record. GB does not allow volume, pan or EQ separation of each mic after the recording is done as it's a stereo file. Here's hoping Ver. 2 has at least EQ. The other issue I came across was the headphone output of the iMic is low especially when playing the drums. You can either get a headphone amp or plug in the outputs of the iMic to your mixer and setup an aux monitor section. Be careful though to properly assign this headphone mix as you don't want to end up recording the metronome click and music tracks to your drum track.
Electric Kit with Camera Connection Kit (The Body Electric)
As mentioned in a previous article, in order to get MIDI control for the iPad, you will need the Camera Connection Kit and a USB MIDI interface.
Korg Nano Pad or other drum finger pad trigger
You will need a powered USB hub to use the Korg NanoPad. Also, if you need to assign different MIDI note mappings to the pads, this will have to be done in Korg's editing software on your Mac.
Record From Mixer To Ipad Garageband Video
V-Drums
For even more drum like control, you can plug in a set of V-Drums into the iPad. The V-Drums doesn't have a USB out but you can use a MIDI to USB converter, like the M-Audio UNO into the Camera Connection Kit. A Google search will show many MIDI USB devices compatible with the iPad.
Recording Control (We Have Assumed Control..)
Mic positioning ('Roll the Bones'): 3-4 mics and it captures the kit superbly with a nice room sound. If you're not sure of what his technique is, just do a Google search for 'Glynn Johns'. When using just a stereo mic, experimentation is key with the distance from the drums, in line with the kick or snare, placing it as an overhead, etc.
Room selection/dampening/drum tuning ('Workin' Them Angels'): Without a doubt, one of the key things to recording a great drum sound is TUNING! Wait.. you can tune drums?I've lost count as to the amount of recordings I've heard from bands recording themselves on a budget with poorly tuned drums. When properly done, even cheap drums can sound great and if you're not sure on how to tune, check out this tutorial on Recording Drums.
The room you place your drums in will also be key to it's tone. Try to find a room with high ceilings, wood panel walls, or soft furniture to absorb and disperse the sound. Drums are LOUD and in a small, low ceiling room will cause all sorts of problems. Empty rooms with dampening can also cause standing wave problems. Perhaps ask friends with appropriate rooms or even small churches if you can spend some time recording. Lastly, get moving blankets or office dividers if the room is close but not quite perfect in sound to help alleviate problems such as slap back or an overly loud kick drum.
Expansion 1 also extends existing categories like Time Warp and Space and Delay, adding swirling delays and serrated time-based effects to mangle up your mix or texture your tracks.Hear gestures from Expansion 1 by checking out the audio player below. Free Stutter Edit: Expansion 1 presetsExpansion 1 breathes fresh life into your Stutter Edit possibilities with 11 new preset banks containing over 250 new gestures. We'll play a short snippet of our track without effects, then let you hear several variations of Expansion 1 gestures in each category. 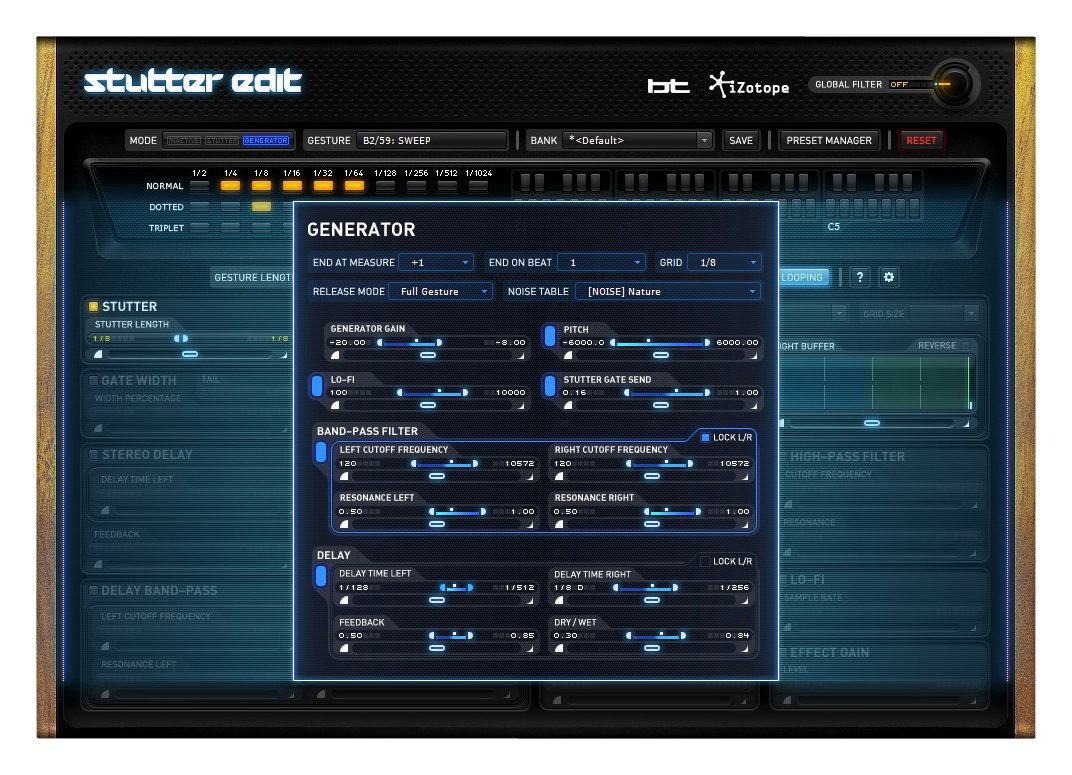 Introducing new preset bank categories like Glitch and Instruments, Expansion 1 comes fully loaded with gestures that can cut up your glitch tracks or re-invent your guitars, vocals, and synths.
Recording then looping sections (Subdivisions). In a previous tutorial, I explained how GB does things in 'Song Sections' where you can specify how many bars each section is. Here's a trick though for drummers that's useful especially with demo's of songs or for experimentation of new ideas. With this method, it's likely the drummer won't be playing with any backing tracks on the iPad other then a click since he's going to repeat sections of the song, so perhaps set up someone playing the bass/guitar parts, etc. in his monitors. Otherwise, lay down a ghost track and copy/paste it numerous times for different drum takes. Set your 'Song Section' to 'Automatic' so that it will record an infinite number of bars.
The drummer then plays along to the click/ghost track and records various takes of the song or parts of the song. Here's an example. Verse 1 may be recorded three times with the same groove but perhaps a different fill on the end or with/without ghost notes on the snare. Now you can edit the track using the split tool and break apart the takes into various parts such as drum groove/groove with ghost notes/groove with ride/drum fill 1/drum fill 2/etc. Duplicate the track by tapping on the track icon and hitting 'duplicate'. A second track will appear but it will be empty. We have two options to get parts pieced on the duplicated track. You can 'copy' the recorded parts and 'paste' them into the duplicated track to form the song. Be sure to select the duplicate track after copying or you will be pasting over the original and move your playhead to where you want to paste the part in. OR.. you can touch the section and drag it to the duplicated track and the bar you want. Looping is also available on these parts so you can easily repeat good takes. Once these parts are done, the original track can be deleted to free up tracks for other instruments. This method can also be applied for vocals, guitar, etc. but the trick is to have at least one track available to allow for duplication.
Using 'Smart Drums' (And the meek shall inherit the earth..)
When GB first came out for the Mac, one of the best things I loved doing was writing and recording a song then taking out the standard rock drum beat and replacing it with something totally unexpected. This allowed me to see the possibilities of different rhythmic combinations/instruments and perhaps give the song a unique flavor. One of order of Indian tabla coming up! If you're not a drummer, 'Smart Drums' with the 'Dice' feature will randomly play different drum patterns. Once you find something you like, simply move the playhead into position and hit record.
For recording drum parts on the screen, GB makes it easy by not having you play all the parts at once. You can start with just the kick drum. Rewind and add the snare. Now the hi-hat and so on. Quantization will also groove it better in most cases too. Also, the drums are 'touch sensitive' and hitting different areas of the hi-hat, snare and ride will give you various tonal aspects of their sound.. very nice feature!
Record From Mixer To Ipad Garageband To Computer
Recording Tips! (Closer To The Heart)
Set up drums, drummer joke, mic up drums, another drummer joke, and run if the words 'Hey Guys.. I got an idea for a song!' are spoken by said drummer. As with most drum sessions, patience is a virtue. Drums are finicky and need time to be properly setup. Mixmeister express alternative free. Monitor your drum sound with speakers and headphones as each will present their own sound of the kit and problems. Don't skimp on using quality headphones either since they may make you aware of issues you wouldn't hear in regular monitors. Problems such as a squeaky kick pedal or drum stool, unwanted room slap back, badly tuned toms (tuning with headphones is quite useful too!), unwanted buzzing of an object in the room (i.e. picture frame/vase/acoustic guitar strings).
Good luck if you're recording a kit this big!!
Record From Mixer To Ipad Garageband Pro
If you're using multiple mics, check for phasing! You can't fix this in the mix since the drums will be summed to a stereo channel in GB. Your drummer also might consider spending some money on his own in-ear monitors since they will cut down on click track bleed. He also won't need the volume to be as loud since they will block out the majority of his live drum sound. Be safe on your volumes! Consider taking 2 days to track the drums.. one to setup and experiment and the second to actually record. Let the drummer warm up for a while perhaps with the click of the song. Work on feel and groove with this click! Try different snare drums if you have the option. One likes to believe in the freedom of music!